Categories
Bathroom Plumbing

What to Do If Your Shower Isn’t Draining Properly (Exeter Homeowners’ Guide)

There’s nothing quite as annoying as standing in an inch of water every time you have a shower. If your shower tray is draining slowly — or not at all — you’re definitely not alone. At EPM, we regularly get callouts in Exeter and the surrounding area for blocked or sluggish shower drains.

The good news? Not every slow drain needs a plumber. Here’s how to tell what’s going on — and when it’s time to call in a pro.

First: Is It Just a Bit of a Clog?

The most common culprit for poor shower drainage is exactly what you’d expect: hair, soap scum, and product buildup. Over time, this gunk collects in the waste trap or pipework and slows the water flow. In worse cases, it can block the pipe entirely.

Try This First

  • Boiling Water – Pour a full kettle down the drain to soften any soap buildup.

  • Bicarb and Vinegar – Follow up with ½ cup of bicarbonate of soda, then ½ cup white vinegar. Let it fizz for 10–15 minutes, then flush with hot water.

  • Hair Hook or Drain Snake – Use a plastic hair hook or a proper drain snake to pull out clumps of hair and debris.

You’d be surprised how many drains we’ve unblocked over the years that could’ve been sorted with a £2 tool and 10 minutes.

Still Not Draining? Let’s Look Deeper

If you’ve cleared what you can see and the problem persists, you might be looking at:

1. Blocked Waste Pipe Further Down

Sometimes the blockage is deeper in the pipework — beyond what you can reach with a basic tool. If your shower shares waste pipework with a basin or bath, and they’re slow too, that’s a big clue.

2. Incorrect Fall or Installation

We’ve come across showers in Exeter homes (especially older properties or rushed DIY jobs) where the waste pipe hasn’t been fitted with enough fall — meaning the water just doesn’t drain away properly. This often needs professional correction.

3. Damaged or Collapsed Pipework

This one’s rarer, but if you’ve got persistent drainage issues, weird smells, or water backing up elsewhere, it could mean damage under the floor or behind the walls.

When It’s Time to Call in a Pro

If you’ve:

  • Tried the basic fixes and it’s still slow

  • Noticed water pooling or leaks elsewhere

  • Smelt foul odours coming from the drain

  • Got multiple slow drains at once

…then it’s time to get in touch with a qualified plumber.

At EPM, we’re used to dealing with awkward shower blockages — and spotting when it’s something more serious. We’ve even had jobs where rodents chewed through waste pipes, causing slow drainage and hidden leaks.

And every now and then, we’ve been called to properties where a blocked shower was left so long, it caused a flooded bathroom. In a few cases (especially in rentals), tenants simply kept using the shower, even as the water rose above their ankles. By the time we arrived, water had seeped under flooring and into downstairs ceilings. Not ideal — and definitely avoidable.

A Note on Walk-In Showers & Wet Rooms

If your shower is part of a walk-in or wet room setup, things can get a bit trickier. The drains are often built into the floor, and blockages may not be accessible without removing tiles or panels. It’s always best to get a professional diagnosis in those cases — and we’re happy to help.

How to Prevent Future Blockages

Here’s a quick list of easy habits that make a big difference:

  • Use a hair trap in the drain — especially if you’ve got long hair.

  • Flush with boiling water once a week to clear soap scum.

  • Avoid heavy oils or bath bombs in showers not designed for them.

  • Clean the trap monthly – or more often if you notice slow flow.

It’s the little things that stop the big issues.

Final Thoughts from EPM

If your shower isn’t draining properly, it’s worth giving it a go yourself — but know when to stop. We’ve seen homeowners spend hours trying to fix something that needed a 15-minute pro job.

We’re always on hand in Exeter and the surrounding area to check your drains, sort the problem, and make sure it doesn’t come back. Quick, clean, and done properly.

Categories
Plumbing Plumbing & Heating

How to Prevent Water Hammer in Your Pipes

If you’ve ever heard a loud banging or knocking noise when you turn off a tap or your washing machine finishes a cycle, you’re not imagining things — that’s water hammer. And it’s more than just annoying. Left unchecked, it can damage your plumbing over time.

Let’s break down what causes it, how to prevent it, and what we see in homes across Exeter.

What Is Water Hammer?

Water hammer happens when water flowing through your pipes suddenly stops or changes direction. This creates a shockwave that can cause your pipes to vibrate or bang against walls, joists or other pipes. It’s most common with fast-acting valves like those on washing machines and dishwashers.

Over time, this constant pressure can wear down pipe joints, cause leaks, or even lead to burst pipes in more extreme cases.

How to Prevent Water Hammer

Here are the most effective solutions we recommend:

1. Install Water Hammer Arrestors

These are mechanical devices that absorb the shock of moving water. They’re commonly fitted to appliances like washing machines and dishwashers. If you’re having a new appliance installed, it’s worth asking your installer to check for these.

2. Secure Loose Pipework

Sometimes the issue is simply that pipes aren’t clipped properly. If they’re allowed to move, the sound can be much worse. We often find this in older properties around Exeter where pipework has been modified over time.

3. Reduce Water Pressure

High water pressure can make water hammer worse. A plumber can test your incoming pressure and fit a pressure-reducing valve (PRV) if needed. Ideally, you want your pressure around 3 bar or below.

4. Replace Old Valves

Worn-out or faulty valves can close too abruptly. In some cases, swapping old isolation valves for modern, quarter-turn ones can ease the issue.

Can You Fix It Yourself?

If you’re confident and the problem is minor (like a loose pipe or no arrestors on an appliance), you might be able to handle it. But if it’s ongoing, or if you’re seeing signs of leaks or pipe movement, it’s best to get a professional in.

At EPM, we’ve helped plenty of homeowners in Exeter deal with noisy pipework. Sometimes it’s a quick fix, sometimes it’s a bit more involved — but we’ll always give you the honest answer.

Final Thoughts

Water hammer might seem like a harmless nuisance, but over time it can cost you — whether in repairs, leaks, or long-term wear on your plumbing system. If you’re dealing with banging pipes, give us a call. We’ll come take a look and let you know exactly what’s going on.

Categories
Plumbing

Why Does My Kitchen Sink Smell? Common Causes and Fixes for UK Homes

If you’ve walked into your kitchen and been hit with a nasty whiff you can’t quite place — chances are, your sink is the culprit.

Smelly kitchen sinks are one of the most common callouts we get here at EPM. The good news? In many cases, the cause is easy to sort. And if it isn’t, we’re just down the road in Exeter and happy to help.

Let’s break it down.

What’s That Smell?

A foul smell coming from your kitchen sink usually means that something in the drainage system isn’t right. This might be food waste, grease, or even an issue with how the pipework is set up.

Let’s look at the most common causes:

1. Food Debris in the Trap

Bits of food can get trapped in the U-bend (also called the trap) under your sink. Over time, they break down and start to smell — especially if they’ve been sat there for a while.

✅ Fix:

  • Pour a kettle full of boiling water down the plughole.

  • Follow it with a cup of baking soda, then a cup of white vinegar.

  • Let it fizz for 10–15 minutes, then rinse with more hot water.

Doing this monthly can help keep smells away.

2. Grease and Fat Build-Up

Cooking oils and fats might seem harmless when poured down the drain, but once they cool, they harden. This creates sticky gunk in your pipes that traps food and bacteria.

✅ Fix:

Avoid pouring grease down the sink in the first place. Use paper towels to wipe pans before washing. If grease has already built up, use a biological drain cleaner (like those with enzymes) or give us a ring to clear it professionally.

3. Dry Trap (Especially in Second Sinks)

If your kitchen has a second or rarely used sink, the trap may dry out. That water in the U-bend acts as a seal against smells. If it evaporates, you’ll get odours from the main drainage system.

✅ Fix:

Run the tap for 30 seconds to refill the trap. If you’re not using the sink often, try to run water down it at least once a week.

4. Blocked or Poorly Installed Waste Pipes

We’ve been to plenty of homes around Exeter where the pipework under the sink wasn’t installed correctly — poor gradients, wrong fittings, or just a mess of adaptors. This can cause waste to linger, stagnate, and smell.

✅ Fix:

This is usually one for the pros. We’ll assess the pipework and make sure it’s running efficiently and meets regs.

5. Dishwasher Backflow

If your dishwasher drains into the same waste pipe as your sink and there’s no proper air gap or trap, dirty water from the dishwasher can back up into the sink — or at least make it smell like it.

✅ Fix:

Make sure the dishwasher waste pipe loops up above the connection point (called a “high loop”). If the smells persist, you may need a separate trap or check valve installed.

Keep Your Sink Fresh: Quick Tips

  • Boiling water once a week helps flush out grease and waste.

  • Avoid harsh chemicals — they can damage pipework and aren’t always effective.

  • Use a plughole strainer to catch food scraps.

  • Consider a regular drain maintenance plan — especially in busy households.

When to Call in a Professional

If the smell sticks around no matter what you try — or you spot signs of a slow drain, leak, or unusual gurgling — it’s time to get someone in. Some issues (like incorrectly fitted pipework or deep blockages) won’t be fixed with baking soda alone.

At EPM, we’ve dealt with everything from blocked traps to entire kitchen waste systems needing a refresh. We’re local, responsive, and always happy to give honest advice.

Final Word from EPM

A smelly sink might seem minor, but if left unchecked, it could lead to more serious issues. Don’t ignore it — and don’t be embarrassed either. We’ve seen it all (trust us).

If your kitchen sink smells and you’re based in Exeter or the surrounding areas, give us a shout. We’ll get things sorted quickly — and properly.

Categories
Plumbing

How to Fix a Blocked Toilet (Without Making It Worse)

Let’s be honest — blocked toilets are up there with the most dreaded DIY jobs. But if you’re standing there right now with the water rising and a bit of panic setting in, don’t worry. We’ve got your back.

At EPM, we’re called out to blocked toilets regularly across Exeter and the South West. And while some cases need a pro, others are totally fixable with a bit of patience (and maybe a peg on your nose).

Let’s break it down — when you can fix it yourself, how to do it safely, and when to absolutely call a plumber.

First Things First: Don’t Keep Flushing!

We know it’s tempting. You flush once, it doesn’t clear, so you think: “One more flush should do it.”

Please don’t.

If the toilet’s already blocked, a second flush could cause the bowl to overflow — and nobody wants that. Step away from the flush handle.

What You’ll Need

Before you get stuck in (not literally), grab:

  • Rubber gloves (trust us on this)
  • A good-quality plunger (the flange kind works best for toilets)
  • A bucket
  • Old towels or newspaper for the floor
  • Optional: drain-unblocking fluid (but use with caution)

🪠 Step-by-Step: How to Unblock Your Toilet

  1. Check What You’re Dealing With

Is it just slow to drain? Or is the bowl full and not going anywhere?
If it’s the latter and it’s been flushed recently, give it 10–20 minutes — water levels may drop enough to safely plunge.

  1. Use a Plunger (Properly)
  • Make sure the plunger’s rubber cup fully covers the hole at the bottom of the pan.
  • Press down gently at first to get a seal.
  • Then plunge up and down with some force — about 15–20 seconds.
  • Break the seal and see if the water drains. If not, try again a few times.

Pro tip: Add a bit of hot (not boiling) water to the bowl before plunging. It can help loosen things up.

  1. Try Washing-Up Liquid + Hot Water
  • Add a generous squeeze of washing-up liquid to the bowl.
  • Follow with a bucket of hot (not boiling) water poured from waist height.
  • Let it sit for 10–15 minutes and try flushing once.
  • This can help break down blockages caused by toilet paper or minor clogs.
  1. Use a Toilet Auger (If You’ve Got One)

If plunging doesn’t work, a toilet auger (sometimes called a snake) can help reach deeper blockages. Just be careful not to scratch or damage the ceramic inside the toilet.

  1. Still Blocked? Time to Call EPM

If you’ve tried the above and it’s still not shifting — or worse, the water’s coming back up — it’s time to call in the pros.

Some blockages are further down the line (even in the main soil pipe), and no amount of plunging will fix it.

We’ve also seen:

  • Build-ups from non-flushable wipes
  • Kids’ toys dropped down the loo (seriously)
  • Tree roots causing drainage issues outside

We’ve got the tools to diagnose and fix the problem fast — without wrecking your bathroom in the process.

Bonus Tips to Avoid a Blocked Toilet in Future

  • Only flush the 3 Ps: pee, poo, and (toilet) paper
  • Bin wet wipes — even the “flushable” ones
  • Avoid using too much toilet paper in one go

Keep kids away from the flush if they’re in the “experimenting” phase

Final Word from EPM

Toilet blockages happen to everyone — don’t stress. If you can fix it safely, great. But don’t be a hero if it’s not shifting.

If you’re in Exeter or the surrounding area, we can sort it quickly, cleanly, and without judgement (we’ve seen it all).

📞 Call EPM today or enquire online — we’re here when you need us.

Categories
Plumbing Plumbing & Heating

How Do I Turn My Water Off? A Plumber’s Guide to Avoiding Disaster

As a plumber, I’m constantly surprised by how many homeowners and tenants have no idea how to turn off the water supply to their property. I don’t have exact statistics, but trust me – it’s a lot! This lack of knowledge often leads to preventable disasters when leaks or burst pipes occur.


Knowing where your stopcock is located and ensuring it works before an emergency happens can save you from flooding, extensive damage, and costly repairs. In this article, I’ll walk you through why this is so important, common (and uncommon) stopcock locations in the UK, and the different types of stopcocks you may encounter.

Why You Need to Find Your Stopcock Now - Not Later

Emergencies don’t wait for a convenient time. Imagine a pipe bursting in your kitchen or bathroom, water pouring everywhere, and you have no idea how to stop it. Panic sets in, and precious minutes – sometimes even hours – are lost.


We once dealt with an insurance job where a group of students on the third floor of a rental property had a massive leak. They had no clue how to shut the water off, and their landlord was on holiday. By the time the water was finally stopped five hours later, the damage was catastrophic – completely preventable if they had known where the stopcock was.


This is why every homeowner, tenant, and landlord must locate and test their stopcock before they need it.

Where to Find Your Internal Stopcock

The internal stopcock (also known as an isolation valve) is your first line of defense in an emergency. In most UK homes, it is typically found:


  • Under the kitchen sink (the most common location)
  • In a utility room
  • In an airing cupboard (especially in older properties)
  • Under the stairs
  • Near the front door, particularly in flats and apartments
  • In the bathroom, behind a panel or near the toilet
  • In basements or cellars (less common but possible)


If you can’t find it, check your property’s paperwork or ask a plumber to help you locate it.

What If the Internal Stopcock Doesn't Work or You Can't Find It?

If your internal stopcock is stiff, broken, or missing, you need to turn off the external stopcock. This is usually found:


  • On the pavement or driveway, near the boundary of your property
  • Under a small metal or plastic cover labeled ‘Water’
  • In shared accomodation or flats, it may be in a communal area


If you have trouble turning it, use a stopcock key (available from most DIY stores) or contact your water supplier for assistance. In some cases, external stopcocks may be buried under soil or hidden by garden landscaping – so it’s a good idea to locate and check yours before an emergency happens.

The Different Types of Stopcocks

There are a few different types of stopcocks you might encounter:


  • Traditional Brass Stopcock – A simple, tap-like valve that you turn clockwise to shut off.
  • Lever Ball Valve – A red or blue lever that turns 90 degrees to isolate the water supply.
  • Push-Fit Shut-Off Valves – Common in newer homes, these are simple push-button shut-off mechanisms.


If your internal stopcock is old or difficult to operate, consider having it replaced with a newer, easier-to-use alternative.

Landlords: Show Your Tenants How to Isolate Water!

Landlords have a responsibilty to ensure their tenants know how to isolate the water supply. A quick five-minute walkthrough during check-in can prevent thousands of pounds in damage later. A simple note in the welcome pack stating where the stopcock is located could save your property from a major insurance claim.

Final Thoughts

Don’t wait until you’re ankle-deep in water to figure out how to turn it off! Take five minutes today to locate your stopcock, test it, and ensure it’s working. If you’re a landlord, show your tenants. If you’re a tenant ask your landlord. A little preparation now can prevent a world of trouble later.


If you need help finding or replacing a stopcock, get in touch with a professional plumber – before it’s too late!

Categories
Plumbing

7 Common Plumbing Problems in UK Homes & How to Fix Them

If you’re a UK homeowner, you’ve probably faced your fair share of plumbing headaches. One day your boiler loses pressure, the next your radiators won’t heat up properly, and let’s not even start on that endlessly dripping tap! The good news? Most common plumbing issues have straightforward fixes—some you can handle yourself, and others where it’s best to call in the pros.

Let’s dive into the biggest plumbing problems UK homeowners face and how to fix them.

1. Why Does My Boiler Keep Losing Pressure?

🔧 The Problem: Your boiler pressure keeps dropping, leading to poor heating and hot water performance.

💡 Why It Happens:

  • A leak somewhere in your heating system
  • A faulty pressure relief valve
  • Recently bled radiators releasing trapped air
  • A faulty expansion vessel that can’t maintain pressure

How to Fix It:

  • Check for visible leaks (under radiators, around pipework) and call a Gas Safe engineer if you find one.
  • Repressurise the boiler using the filling loop (your boiler manual will guide you).
  • If the expansion vessel is faulty, it may need repressurising or replacing—this is best handled by a professional.
  • If the pressure keeps dropping, it’s time to book a professional inspection.

2. Radiators Have Cold Spots

🔧 The Problem: Your radiators heat unevenly, leaving cold patches or staying lukewarm.

💡 Why It Happens:

  • Air trapped inside the radiator
  • Sludge build-up blocking hot water flow

How to Fix It:

  • Bleed your radiators using a radiator key (you’ll hear hissing as the air escapes).

If that doesn’t work, your system may need a power flush to remove built-up sludge

3. Low Water Pressure

🔧 The Problem: Your taps and shower have a frustratingly weak flow, making simple tasks take forever.

💡 Why It Happens:

  • Limescale build-up in pipes or showerheads (especially in hard water areas like London and the South East, not a common problem in Exeter!)
  • Leaks or blockages in the plumbing system, or blocked/ seized valves
  • Low mains water pressure from your supplier

How to Fix It:

  • Clean your showerhead and tap aerators with a descaling solution.
  • Check for leaks and fix them promptly.
  • Check valves and stop cocks or isolation valves are fully open and functional
  • If the issue is persistent, consider installing a water pressure booster pump.

4. Why Is My Tap Dripping?

🔧 The Problem: A constant dripping tap that wastes litres of water and increases your bill.
💡 Why It Happens:
• A worn-out washer or O-ring
• A faulty valve seat
• Faulty tap cartridge
✅ How to Fix It:
• Turn off the water supply and replace the washer or O-ring, or cartridge inside the tap. (If changing the cartridge, it’s very useful to have the make or model of the tap to get the correct cartridge, failing that, if you take the cartridge to a good local plumbers merchant, they should be able to help
• If unsure, call a plumber to prevent further damage.

5. Slow Draining Sink or Shower

🔧 The Problem: Water pools around your sink, bath, or shower and takes forever to drain.

💡 Why It Happens:

  • Hair, grease, and soap scum clogging the pipes
  • Partial blockages in the plumbing system

How to Fix It:

  • Use a plunger or drain unblocker.
  • Pour boiling water down the drain, followed by baking soda and vinegar to break down buildup.
  • If the blockage persists, it’s time for a professional drain clean.

6. Noisy Pipes (Banging or Whistling)

🔧 The Problem: You hear loud knocking, banging, or whistling noises coming from your pipes.

💡 Why It Happens:

  • Water hammer (sudden stopping of water flow causing pipe vibration)
  • Loose pipes moving when water runs
  • High water pressure

How to Fix It:

  • Install a shock arrestor.
  • Secure loose pipes with brackets or clips.
  • Adjust your stopcock if the water pressure is too high.

Final Thoughts from EPM

Some plumbing problems are quick DIY fixes, while others need a professional touch. Regular maintenance—like bleeding your radiators, descaling your taps, and keeping an eye on your boiler pressure—can save you time, money, and stress.

If you’re struggling with a plumbing issue in your home and need expert help, EPM is here for you. Contact us today for professional, friendly service from your trusted local plumber.

🔹 Serving Exeter & Surrounding Regions
🔹 Gas Safe Registered & Fully Insured
🔹 Fast, Reliable, and Affordable Plumbing Services

📞 Call us now 01392927923

Categories
Plumbing

Why You Should Consider Installing an Unvented Cylinder in the UK

When was the last time you thought about the hot water system in your home? For most homeowners, it’s only when something goes wrong—like running out of hot water halfway through a shower—that they realise just how important it is. If you’ve ever faced inconsistent pressure or have struggled to get a hot shower when you need it most, then you know the frustration.

So, how can you stop worrying about hot water in your home? One solution is an unvented cylinder, and in this article, I’ll explain why you should seriously consider installing one in your home.

But first—what’s the big deal about unvented cylinders?

What is an Unvented Cylinder?

An unvented cylinder is a high-pressure hot water system that’s directly connected to your mains water supply, without the need for a cold water tank in the loft. By tapping into the mains pressure, it delivers strong, consistent water flow to taps, showers, and baths. It’s compact, efficient, and has the potential to solve some of the most common problems UK homeowners face when it comes to hot water.

So why should you install one? Let’s break it down.

1. Get Consistent, High Water Pressure

🔧 The Problem: Are you tired of weak water pressure? You turn on the shower, but the water barely trickles out. Or you try to run multiple taps at once and the water just doesn’t flow like it should.

💡 Why it Happens: If your system relies on gravity, like older heating systems often do, then you’re stuck with low water pressure. The height of the water tank in the loft determines the pressure, and if it’s not high enough, you won’t get the flow you need.

How Unvented Cylinders Help: With an unvented cylinder, you get water directly from the mains supply, so the pressure is significantly higher. This means you’ll experience stronger water flow from taps and showers, even when multiple people are using water at the same time.

Imagine not having to deal with weak showers or waiting for your taps to fill up slowly. That’s the power of high-pressure water on demand.

2. Save Space in Your Home

🔧 The Problem: Do you have a tank sitting in your loft? While it’s there doing its job, it takes up space that could be better used for storage or anything else you need.

💡 Why it’s an Issue: A cold-water storage tank can take up quite a bit of room, especially if your loft space is already cramped. Plus, it can get in the way of loft conversions or other home improvements.

How Unvented Cylinders Help: An unvented cylinder doesn’t require a cold water tank, which means more space for you. With a more compact system, you can free up your loft or wherever the tank was previously stored, allowing for better use of your space. Simple, but incredibly effective.

3. Lower Your Energy Bills with Better Efficiency

🔧 The Problem: Heating water can be expensive. With a traditional system, you might find your energy bills creeping up as the tank stays on to keep water hot, even when you’re not using it.

💡 Why it Happens: Traditional hot water tanks often lose heat over time, meaning the system has to work harder to keep the water hot, leading to higher energy consumption.

How Unvented Cylinders Help: Unvented cylinders are much more energy-efficient. They store hot water at the right temperature, reducing heat loss. Because of their design, they only need to heat the water you’re going to use, which ultimately lowers your heating costs.

If you’re sick of paying for hot water you don’t even need, an unvented cylinder can make a noticeable difference to your energy bills.

4. Never Run Out of Hot Water Again

🔧 The Problem: You’re in the middle of your morning routine, and suddenly—no hot water. Whether it’s a shower or filling up the kettle, there’s nothing worse than running out of hot water when you need it most.

💡 Why it Happens: Traditional systems may struggle to meet the demand when multiple people in the household need hot water at the same time. You’ve probably experienced a lack of hot water in the mornings or after peak usage hours.

How Unvented Cylinders Help: With an unvented cylinder, you can store more hot water and meet the demand, even when everyone in the house is using the taps, showers, and baths simultaneously. The large capacity means you can enjoy a continuous supply of hot water throughout the day.

If you have a growing family or you just hate running out of hot water, this system is a game changer.

5. Better Flow Rate, Better Showers

🔧 The Problem: Are your showers underwhelming? It’s frustrating when you’ve got the temperature set just right, but the water flow is so weak that it’s hard to enjoy the experience.

💡 Why it Happens: If your water pressure is low, you won’t get a satisfying flow, no matter how much you adjust the settings. This leads to weak, unsatisfying showers.

How Unvented Cylinders Help: Unvented cylinders maintain a strong water flow, so you can enjoy a powerful shower every time. Plus, the improved flow rate is perfect for homes with multiple bathrooms or lots of taps running at once.

6. Professional Installation is Essential

While the benefits of unvented cylinders are clear, one important point to remember is that installation requires a professional. In the UK, you can’t just install an unvented cylinder yourself. You need a certified, qualified professional to do the job—someone who is trained in handling high-pressure systems.

💡 Why it’s Important: Installing an unvented cylinder without the proper training can be dangerous. These systems require careful setup to ensure safety and efficiency. If not installed correctly, they can cause leaks, water damage, or even create a fire hazard. Plus, a DIY installation could void your home insurance, and make it impossible to claim if something goes wrong.

So, when you’re ready to install, make sure you call a trained professional. At EPM, our engineers are fully qualified and experienced in installing unvented cylinders safely and efficiently.

Thoughts from Final EPM

An unvented cylinder offers a fantastic solution for homeowners who need consistent water pressure, more space, lower energy costs, and reliable hot water. If you’re tired of weak showers or running out of hot water during peak times, this could be the upgrade you’ve been waiting for.

But remember, professional installation is key. Don’t risk it with a DIY job—get in touch with the experts at EPM to make sure your unvented cylinder is installed safely and correctly.

📞 Call us now 01392927923

Categories
Plumbing

DIY or Call a Plumber? When to Tackle a Leak Yourself in the UK

Leaks are one of the most common plumbing issues UK homeowners face, and at EPM, we’re called out to deal with them daily. A dripping tap, a slow pipe leak, or even a burst pipe can cause stress and potential damage to your home. But when should you grab your toolbox and fix it yourself, and when is it time to call in a professional? More importantly, what are the UK regulations around DIY plumbing, and could a botched job void your insurance?

Understanding UK Plumbing Regulations

Before diving into DIY fixes, it’s essential to know that plumbing work in the UK is regulated. While minor repairs are allowed, certain work must be carried out by a qualified professional. Under UK law:

  • Gas-related plumbing work must always be handled by a Gas Safe registered engineer.
  • Electrical work near water (such as in bathrooms) falls under Part P of the Building Regulations and often requires a certified electrician.
  • Major plumbing alterations may need to comply with local water bylaws.
  • Work affecting mains water supply should follow guidelines from your local water authority.

Failing to follow these rules could not only lead to unsafe plumbing but also invalidate your home insurance

When Can You Fix a Leak Yourself?

You can tackle minor leaks if you feel confident in your DIY skills. Here are some scenarios where a DIY fix is usually safe:

  1. Dripping Taps

🔧 Common Causes: Worn-out washers, faulty O-rings, or a damaged tap cartridge. ✅ DIY Fix: Replace the washer or cartridge inside the tap (turn off the water supply first!).

  1. Leaky Pipe Joints (Minor Drips)

🔧 Common Causes: Loose compression fittings or leaking push-fit joints. ✅ DIY Fix: Tighten joints with a adjustable spanner or ensure push-fit connections are securely in place.

  1. Leaky Toilet Cistern

🔧 Common Causes: Faulty flush valve or worn-out inlet valve seal. ✅ DIY Fix: Replace the faulty component with a like-for-like part.

  1. Small Waste Pipe Leaks (Under Sink)

🔧 Common Causes: Loose connections or degraded rubber seals. ✅ DIY Fix: Tighten the fittings or replace seals as needed.

When to Call a Professional Plumber

Even if you enjoy DIY, some plumbing jobs are best left to a qualified plumber. Call in the experts if:

  1. The Leak is in the Mains Water Supply

🚨 Why? UK water regulations require that mains water supply work complies with specific standards. Incorrect repairs could lead to contamination or pressure issues.

  1. A Pipe Has Burst

🚨 Why? This can cause extensive water damage and requires immediate professional repair.

  1. Boiler or Central Heating System Leaks

🚨 Why? Work on pressurised heating systems should be carried out by a Gas Safe registered engineer to ensure safety.

  1. Leaks Behind Walls or Under Floors

🚨 Why? Hidden leaks can lead to structural damage and mould growth. Professional plumbers use advanced leak detection tools to locate and fix the problem efficiently.

  1. DIY Repairs Haven’t Worked

🚨 Why? If you’ve attempted a fix and the leak persists or worsens, calling a plumber can prevent further damage and unnecessary costs.

  1. Pipes Damaged by Pests (Yes, It Happens!)

🚨 Why? We’ve been to jobs where mice have chewed through plastic pipes, causing serious leaks. If you suspect rodent damage, it’s best to get a professional assessment and consider pest control as well.

Could DIY Plumbing Void Your Home Insurance?

Yes, in some cases. Many home insurance policies state that plumbing repairs must be done by a qualified professional if they involve major systems (like heating, mains water, or drainage). If a DIY repair fails and causes damage, your insurance provider may refuse to cover the cost of repairs. Always check your policy before attempting plumbing work yourself.

Final Thoughts: Know Your Limits

While fixing a dripping tap or tightening a loose joint is a great DIY skill, more significant plumbing issues require professional expertise. Understanding UK regulations and your insurance terms will help you decide when to DIY and when to call a plumber.

If you’re facing a leak and need expert help, EPM is here for you. We provide reliable and professional plumbing services across Exeter and surrounding areas.

📞 Call us now 01392927923

Categories
Plumbing

How to bleed a radiator

If you’re finding your radiators aren’t heating up properly it’s likely they need to be bled to combat the issue and improve your home’s heating efficiency. Luckily, it’s a straightforward job which can be completed in a few simple steps.  Here’s what you’re going to need:
  • Radiator key 
  • Old cloth/towel 
  • Bucket
Step one  After identifying which radiators need bleeding, start with the ones furthest away from the boiler. Ensure your heating is off and all your radiators are cold before beginning!  Step two  Locate the bleed valve (they’re normally located at the top and look like a round hole with a square inside) and place an old cloth or towel beneath to catch any escaping water. Step three   Insert the radiator key and turn the valve anti-clockwise and release the air, you should hear a hissing sound.  Step four Once the water starts to escape and the hissing sound stops, turn the key anti-clockwise to close the valve. Step five  Repeat with any other radiators that need attention, making your way back to the boiler. Step six  Check your boiler pressure gauge. If it’s too low you’ll need to repressurise the system. However, if everything is normal you can switch the heating back on and check your radiators are all performing as they should. There you have it – just a few simple steps to get your radiators performing as they should and your home all nice and cosy again.   

Categories
Plumbing

Why is my radiator cold?

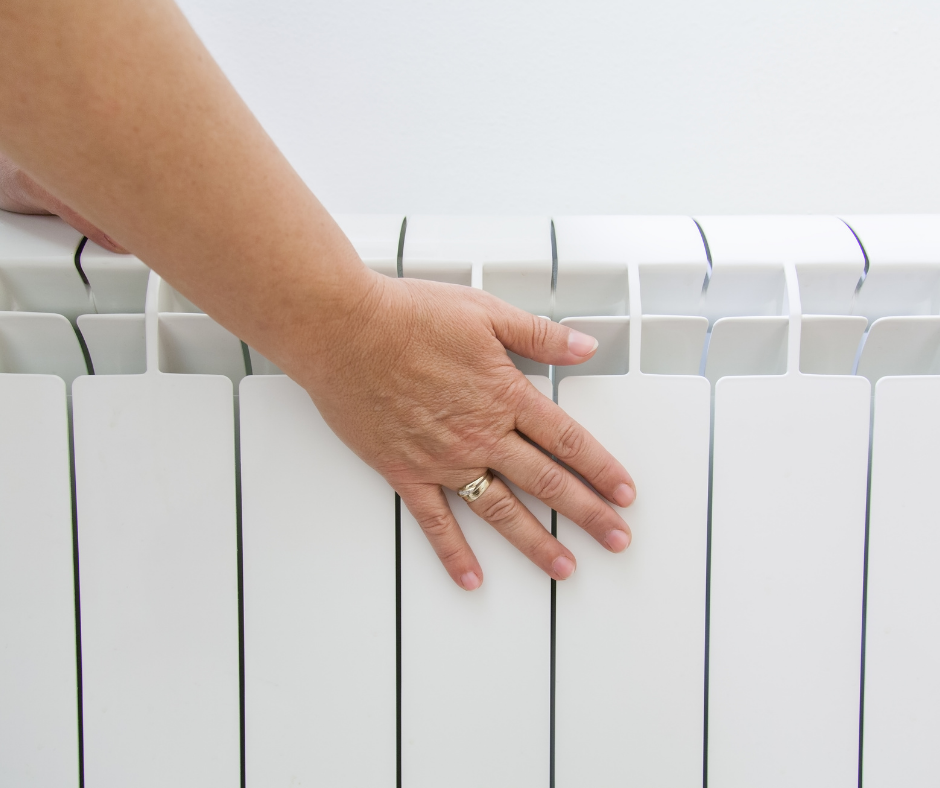
The primary purpose of a radiator is to heat our home and keep us warm, however, sometimes this isn’t always the case.  The most common issue faced when your home isn’t hitting temperature, is that there may be cold spots on your radiator. There are a few reasons why this issue can occur, but luckily more often than not the issue can be quickly solved and we have some handy advice to share to help you do this. The first step to fixing the issue is identifying which part of your radiator is causing the problem as each area can have a different cause.  Radiator cold at the bottom? The likely cause of this is a build-up of sludge and debris, which then obstructs the hot water circulation leaving cold spots in the areas it can’t be reached. Rust, hard water and limescale can be just some of the factors leading to the build-up.  To fix this issue you will want to perform a power flush of the radiator. Whilst this is a method that can be done at home we would always recommend if you’re unsure to get a professional in to help.  Radiator cold at the top  If your radiator is cold at the top, or even the top and the bottom then the likely cause is trapped air within the system. Often the air rises to the top but the hot water remains at the bottom which is how this issue is started. Luckily this is quite a simple fix, you simply need to bleed your radiator to release any of the trapped air.  Radiator cold in the middle  Similar to the bottom of the radiator being cold, if the middle of your radiator is cold it’s likely caused by a buildup of debris or sludge. To fix this you again need to perform a power flush, flushing the insides thoroughly to remove the build-up.  Other things to check
  • Ensure your thermostat is set properly and that the valve has not been set to low 
  • Check the lockshield valve, located at either end of your radiator, is set correctly
  • Check the valves themselves for limescale damage